Your designer just finished a set of beautiful Photoshop files for your next display campaign. Now someone needs to turn those layered PSDs into animated HTML5 banners that actually work — across browsers, across devices, within file size limits, and with the right click tags for your ad server.
This is what we do every day at Digitaland. Agencies and in-house teams send us their layered PSDs and Illustrator files, and we hand-code them into trafficking-ready HTML5 banner sets. This guide walks you through exactly how that process works, step by step, so you know what to expect and what to ask for.
Why You Can’t Just Export a PSD as an HTML5 Banner
This is the first thing people ask. You have Photoshop. You have the design. Why can’t you just export it?
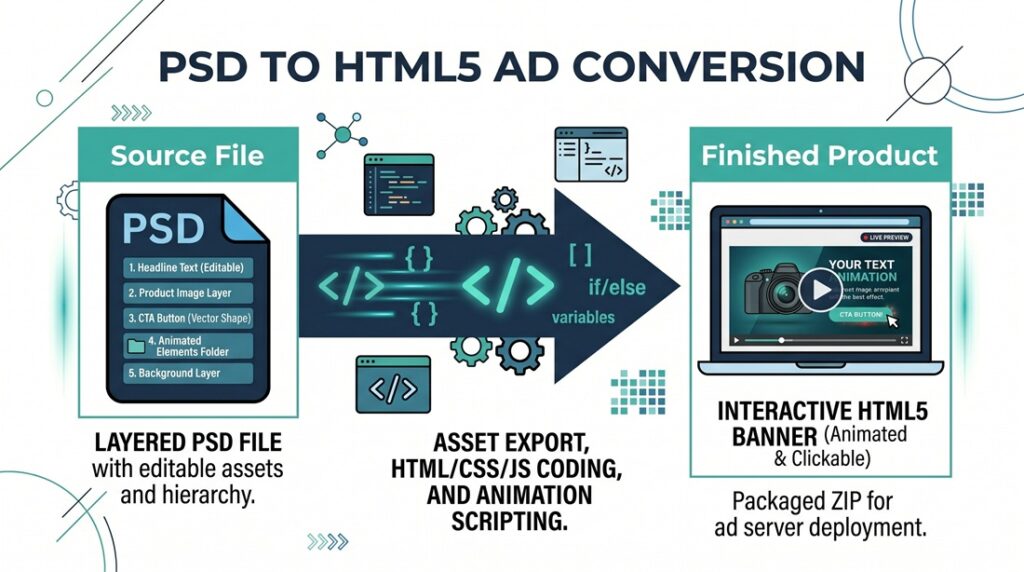
Because a PSD is a flat design file. An HTML5 banner is a tiny website — it’s code (HTML, CSS, JavaScript) that loads in a browser, animates on a timeline, responds to clicks, stays under a strict file size limit, and communicates with an ad server. These are fundamentally different things.
Going from PSD to HTML5 requires someone to take apart your design layer by layer, rebuild each element in code, animate them according to your storyboard, optimize everything for file size, implement the correct click tag for your ad server, and test it all across browsers and devices.
No plugin, export button, or AI tool fully automates this process — at least not at the quality level that passes ad server validation and looks good enough for a real campaign.
What Your PSD Should Include
The better your PSD is organized, the faster and cheaper the production process goes. Here’s what makes a developer’s life easier:
Named and grouped layers. Don’t deliver a PSD with 47 layers all called “Layer 1 copy.” Group them logically: “headline,” “product_image,” “cta_button,” “background,” “logo.” The developer needs to extract each element separately for animation.
Separate layers for every element that moves. If your headline and subhead animate at different times, they need to be on different layers. If the CTA button fades in separately from the logo, separate layers. Anything that animates independently needs its own layer.
Editable text, not rasterized. Keep text as editable type layers, not flattened into images. The developer will rebuild text in HTML/CSS (which is lighter and sharper than a text image) unless the font is extremely custom.
Design at the correct pixel dimensions. A 300×250 banner should be designed at 300×250 pixels. Don’t send a 3000×2500 PSD and expect the developer to figure out the scaling. Design at 1x or 2x at most.
A storyboard or animation notes. Your PSD shows the final frame. But how do the elements get there? Which layer fades in first? Does the product slide from the left or scale up from the center? How long does each animation last? Include a written storyboard, an animated mockup, a quick Loom video walking through it, or even hand-drawn notes. Anything is better than “make it look cool.”
Fonts included. Either embed the fonts in the PSD or send the font files separately. If you’re using a web font (Google Fonts, Adobe Fonts), tell the developer which one so they can load it in the code.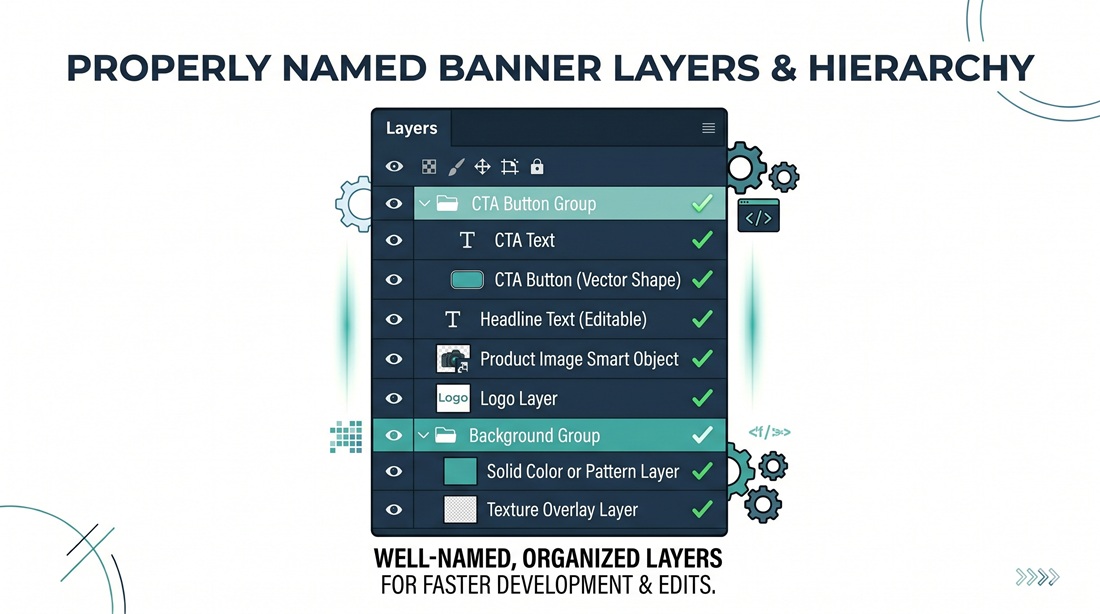
The Step-by-Step Process
Step 1: Asset Review
The developer opens your PSD and reviews the layer structure, image quality, fonts, and overall complexity. They’ll flag issues early:
Is the PSD organized well enough to extract layers? Are any images too heavy for banner file size limits? Are the fonts available as web fonts, or will they need to be subset and embedded? Is the animation achievable within the 150KB limit and 30-second time constraint?
This review usually takes 15-30 minutes and saves hours of back-and-forth later.
Step 2: Layer Extraction
The developer pulls apart the PSD, exporting each element as an individual asset — PNGs for images with transparency, JPGs for photos, SVGs for icons and shapes. Each asset is compressed for web delivery while keeping visual quality.
This is where PSD organization matters. A clean PSD with named layers takes 10 minutes to extract. A messy PSD with flattened groups and unnamed layers takes an hour of detective work.
Step 3: HTML/CSS Structure
The developer builds the banner’s HTML structure — a container at the exact pixel dimensions, with each element positioned using CSS. The background goes in first, then the product image, headline, body copy, CTA button, and logo, each absolutely positioned to match your design.
Modern banner production uses clean, semantic HTML and CSS. No tables, no inline styles if avoidable, no bloated frameworks. Every byte matters when your ceiling is 150KB.
Step 4: Animation
This is where the banner comes to life. Using JavaScript (typically GSAP/GreenSock, the industry standard animation library), the developer builds the animation timeline — which elements appear first, how they move, how long each transition takes, what easing curves to use.
A simple banner might have 3-4 animation steps: background appears, headline slides in, product image fades up, CTA button bounces in. A complex banner might have 15+ steps with overlapping animations, parallax effects, and multiple scenes.
The developer matches the animation to your storyboard, but they’ll also make judgment calls about timing and easing that affect how the banner feels. Good animation is subtle — the difference between a banner that feels cheap and one that feels polished often comes down to easing curves and timing gaps between elements.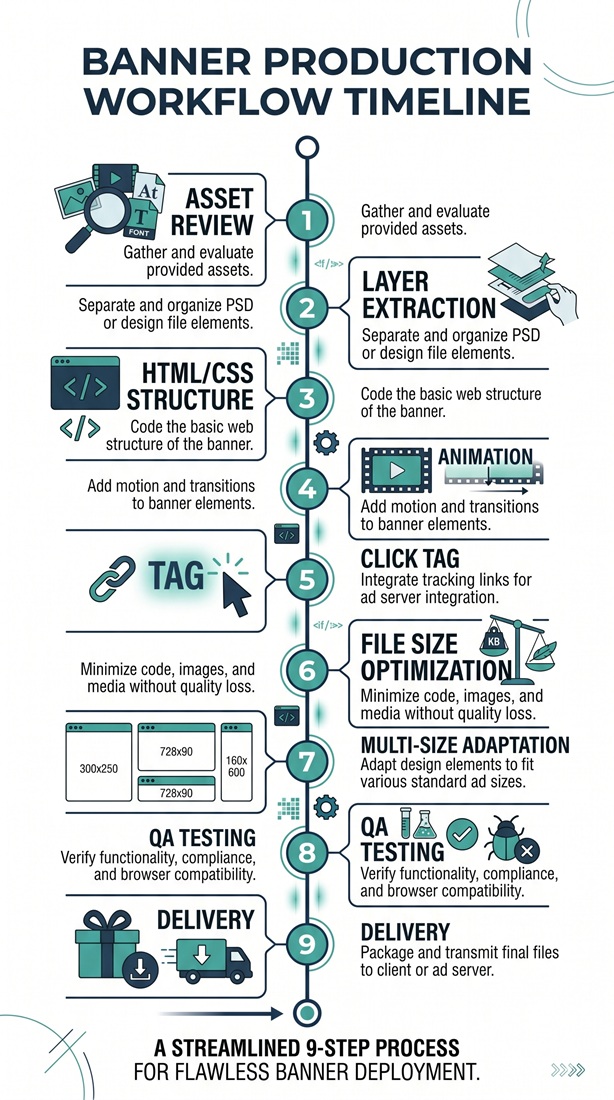
Step 5: Click Tag Implementation
Every banner needs a click tag — the code that tells the ad server where to send users when they click the banner. The exact implementation depends on your ad server:
Google Campaign Manager 360 uses the Enabler SDK with Enabler.exit(). Standard Google Ads uses a clickTag variable. Sizmek uses EB.clickthrough(). Flashtalking uses ft.click(). Adform has its own implementation.
Getting this wrong is one of the most common reasons banners get rejected during trafficking. A good developer asks you which ad server you’re using before they write a single line of code.
Step 6: File Size Optimization
After the banner is built and animated, the developer optimizes for file size. This includes compressing images further, minifying JavaScript and CSS, converting pixel-based elements to CSS where possible (gradients, solid colors, rounded corners), subsetting fonts to include only the characters used, and removing any unused code.
The goal: everything the browser needs to display the banner on first load should be under 150KB. If the banner exceeds that, the developer uses polite loading — showing a lightweight first frame while heavier assets load in the background.
Step 7: Multi-Size Adaptation
Your designer probably created one or two key sizes (usually 300×250 and 728×90). The developer adapts the banner to all remaining IAB standard sizes in your campaign.
This is not just resizing. Each size has its own layout challenges. A 728×90 leaderboard is a thin horizontal strip — the product image that sits next to the headline at 300×250 might need to go behind the text at 728×90, or get removed entirely at 320×50. Good multi-size adaptation means rethinking the layout for each dimension while keeping the creative concept and animation timing consistent.
Step 8: QA and Testing
Before delivery, every banner gets tested:
Does it look right in Chrome, Safari, Firefox, and Edge? Does the animation play smoothly on desktop and mobile? Is the file size under the limit? Does the click tag work and point to the correct URL? Is the backup image included and the right dimensions? Does polite loading work correctly (if applicable)?
At Digitaland, we run every banner through a four-point QA process and use our animation compare tool to check consistency across sizes.
Step 9: Delivery
You receive a ZIP file for each banner size, containing the HTML file, all image and font assets, JavaScript files, and a static backup image. The package is ready to upload directly to your ad server — no additional work needed on your end.
Illustrator Files vs Photoshop Files
Most of the process above applies to Illustrator files too. The main difference:
Illustrator files are vector-based, which means elements export cleanly as SVGs. SVGs are lighter than PNGs and scale perfectly at any size. If your design uses a lot of icons, shapes, and clean graphics, Illustrator files often produce lighter banners.
Photoshop files are better for designs with complex photography, textures, and effects. Photos need to be exported as JPGs or PNGs, which are heavier than SVGs. If your design is photo-heavy, expect more work on the file size optimization step.
Either format works. Just make sure layers are organized and separable.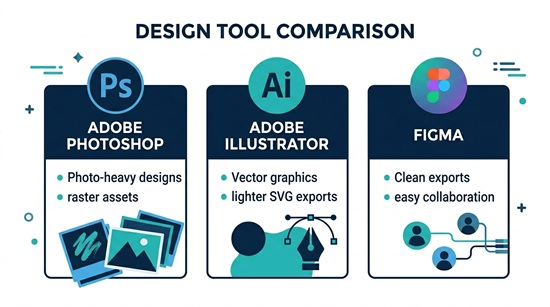
What About Figma?
More designers are working in Figma now. The process is similar — the developer exports layers from Figma instead of Photoshop. Figma’s export tools are actually cleaner than Photoshop’s for web assets, so Figma files are often easier to work with.
If you’re working in Figma, export your design as a layered file (not a flattened image) and include your animation notes separately.
Common Mistakes That Slow Down Production
Flattening layers before sending. If your PSD has everything merged into one or two layers, the developer has to manually cut out every element. This adds time and cost.
Not including animation direction. “Make it animated” is not a brief. The developer will guess, you won’t like the guess, and you’ll burn a revision round. Even rough notes like “headline first, then product, then CTA” saves time.
Sending files at the wrong dimensions. A 300×250 banner designed at 600×500 seems minor, but it means every image is 2x larger than needed, which makes file size optimization harder.
Using fonts that aren’t available as web fonts. If your designer used a font that only exists as a desktop font, the developer needs to subset and embed it, which adds to file size. When possible, use Google Fonts or Adobe Fonts.
Expecting one design to work at all sizes. A layout that works at 300×600 will not work at 320×50. Plan for at least 2-3 layout variations across your size set.
How Long Does It Take?
For a standard campaign (5-6 sizes, animated HTML5, standard click tags):
Turnaround from a production agency: 3-5 business days after asset delivery and storyboard approval. Rush delivery (1-2 days) is usually available for an additional fee.
Turnaround from a freelancer: 3-7 business days, depending on their availability and workload.
Turnaround using AI tools: Same day, but with significant limitations on animation quality and ad server compliance.
The biggest delays usually come from unclear briefs, missing assets, or revision cycles — not the actual coding.
The Bottom Line
Turning a PSD into a production-ready HTML5 banner is not a simple file conversion. It’s a craft that combines design sensibility, animation skill, technical optimization, and ad server knowledge. The better your design files and animation brief, the smoother the process goes.
If your team designs in Photoshop, Illustrator, or Figma and needs a partner to handle the HTML5 production side, that’s exactly what we do.
Digitaland is a hand-code HTML5 production studio. Send us your PSDs, Illustrator files, or Figma exports and we’ll deliver trafficking-ready banners for any ad server. Get in touch to start your next project.